Quinoa Bread 1 Ingredient with Yeast
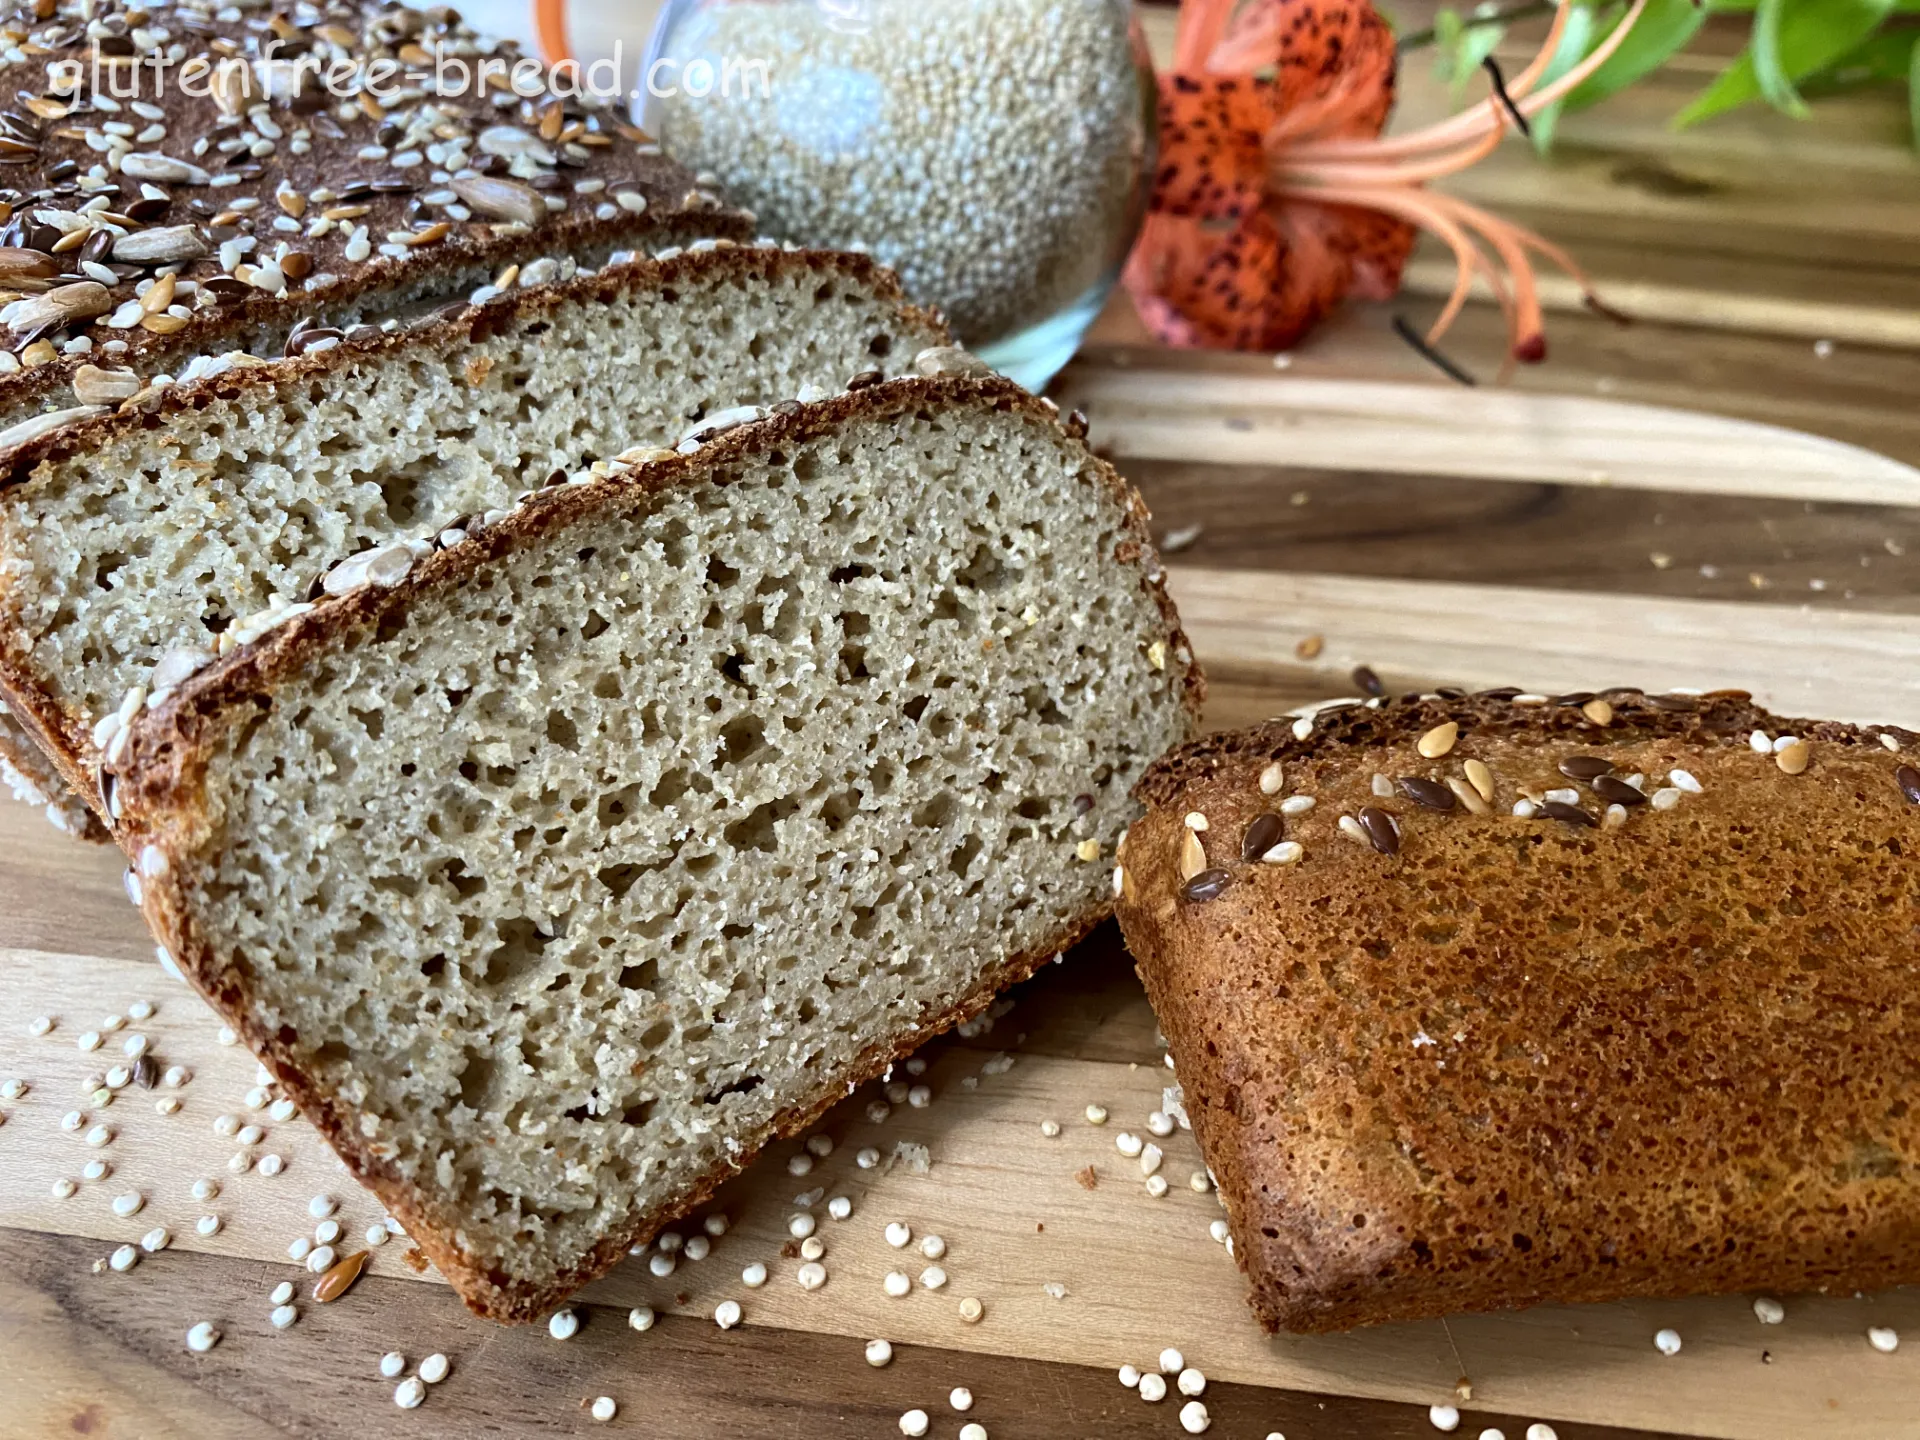
Quinoa bread is exceptionally healthy, packed with complete proteins, fiber, and essential nutrients like iron and magnesium. It features a golden-brown crust and a soft, tender crumb with a subtle nuttiness from the quinoa. Perfect for sandwiches or enjoyed with a pat of butter, this bread delivers both a nourishing boost and a comforting bite. It pairs perfectly with Mushroom Soup, where its crispy crust and soft interior complement the rich, umami flavor and creamy texture of the soup, creating a delicious and satisfying meal.
Ingredients:
| Name | Metric | US |
|---|---|---|
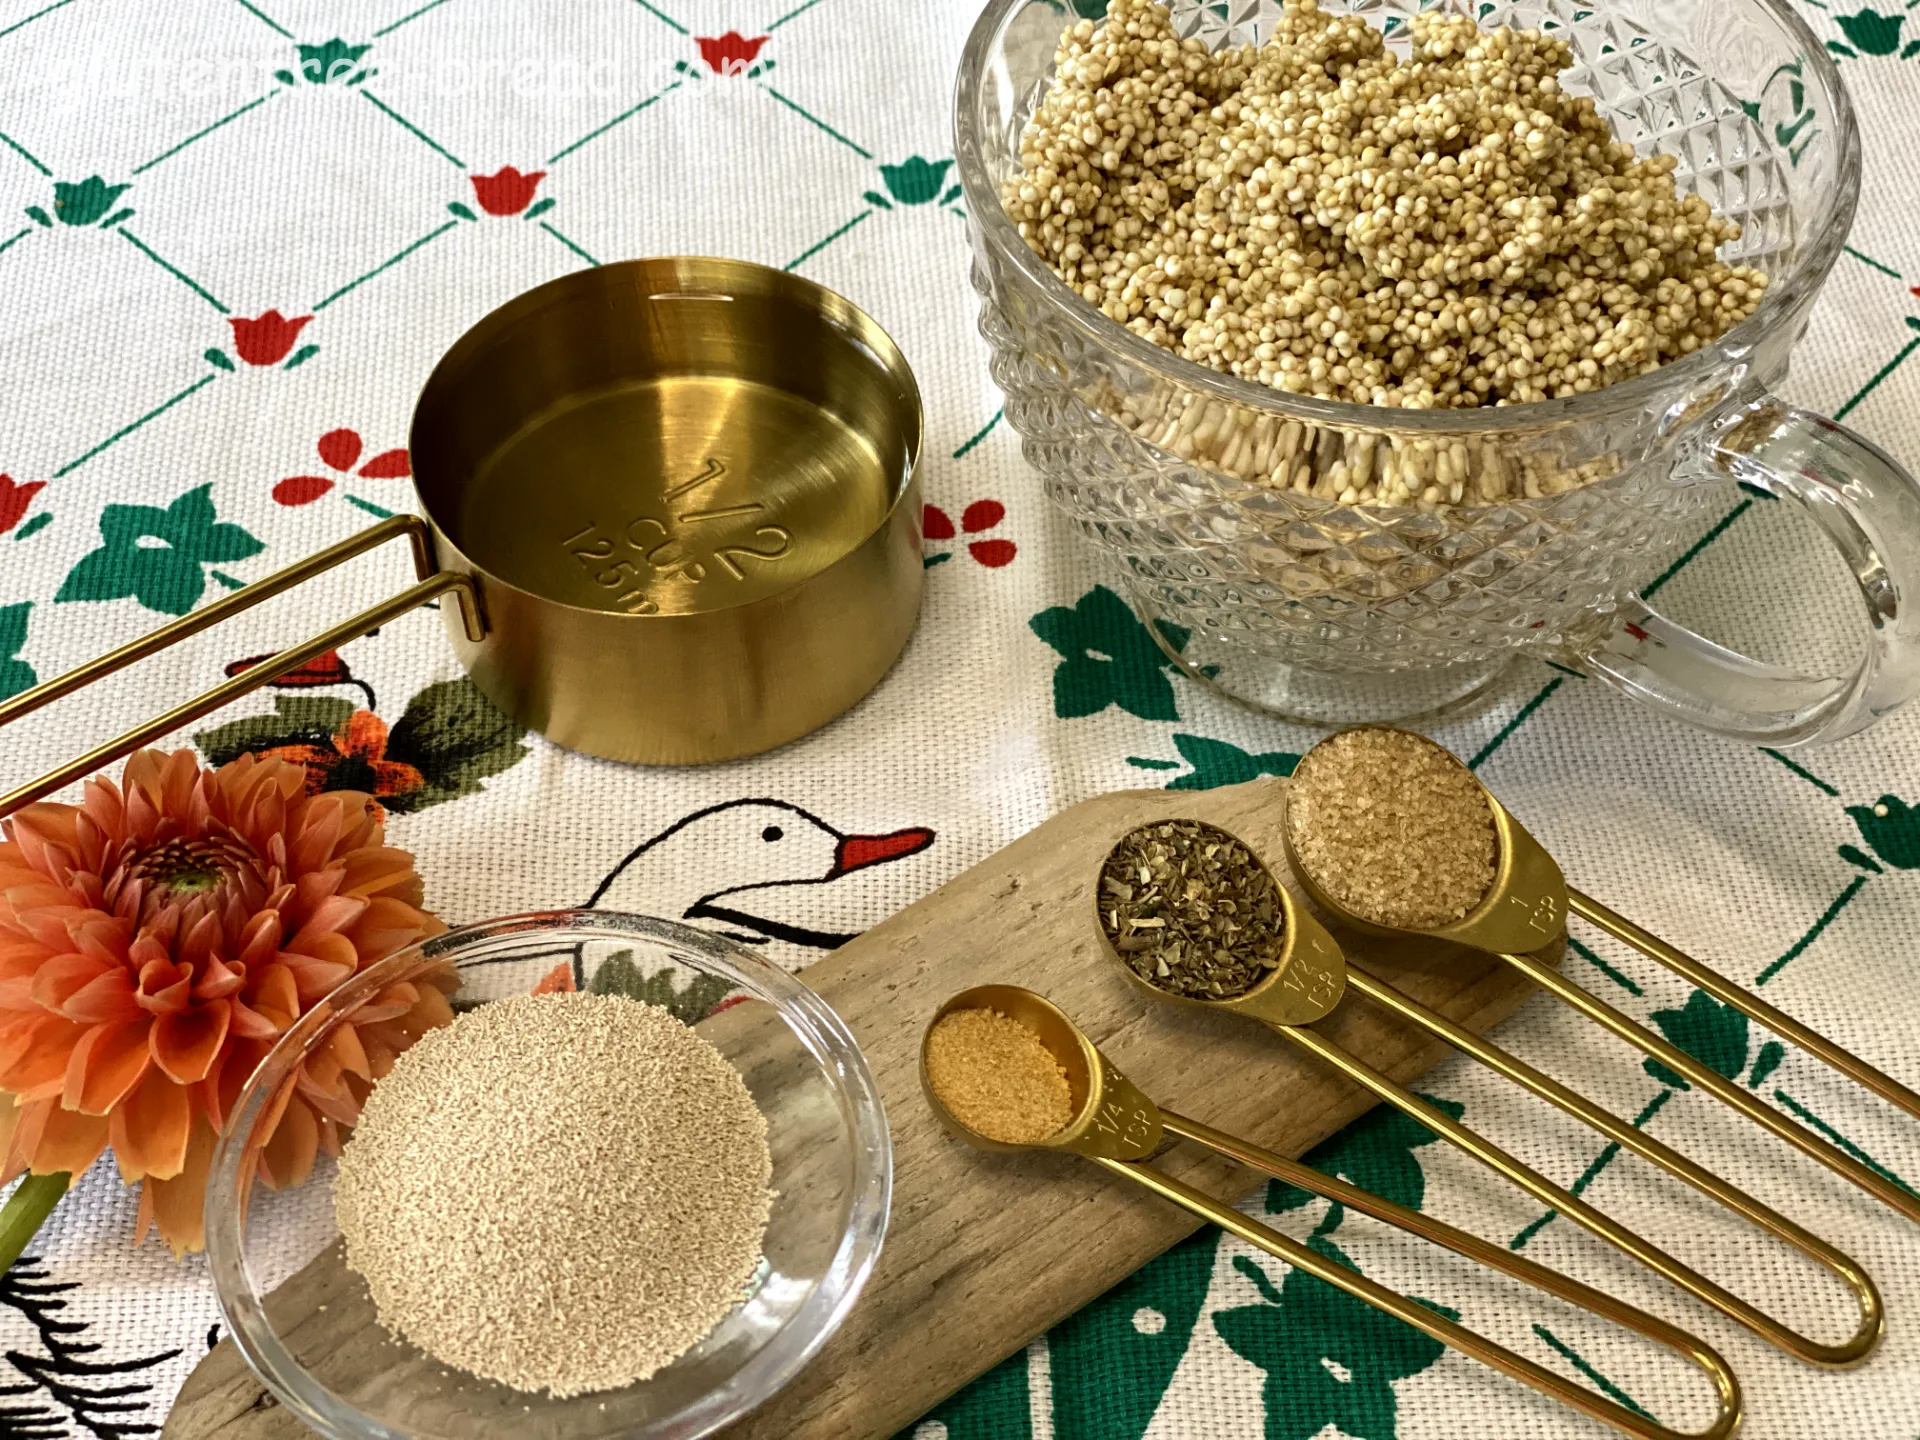
| Quinoa, dry | 300 gr | 1 3/4 cups |
| Water, up to | 600 ml | |
| Salt | 6 gr | 1 teaspoon |
| Dry Yeast | 4 gr | 1/2 teaspoon |
Optional Ingredients
- 3 gr / 1/2 tsp Sesame Seeds
- 3 gr / 1/2 tsp Garlic Powder
Equipment:
- Blender
- Loaf pan 8.5in x 4.5 inch / 21.5cm x 11.5cm
Steps:
Step 1
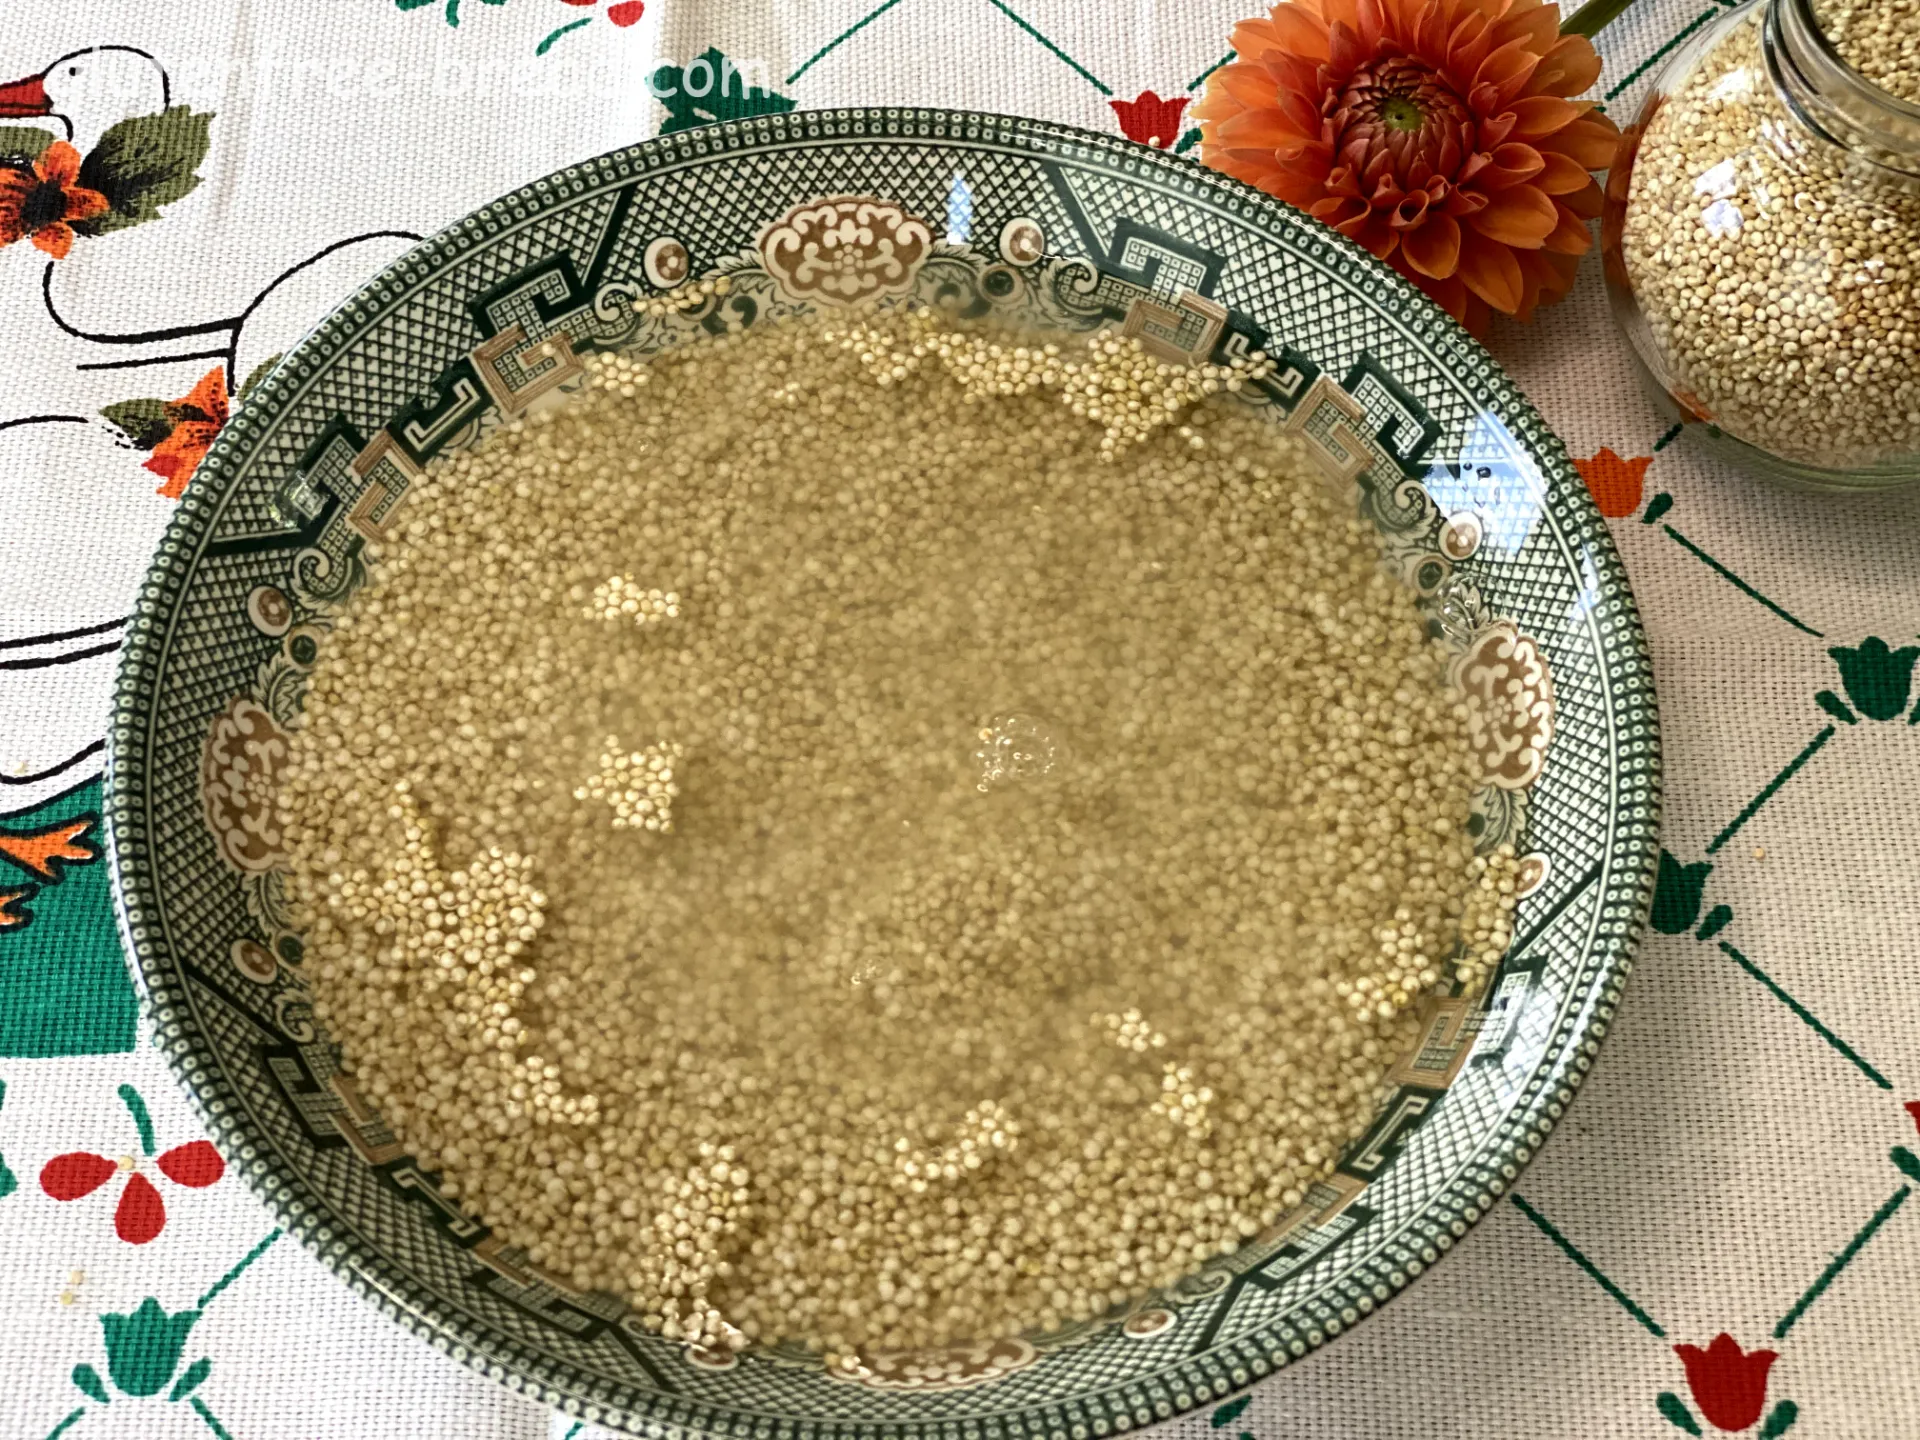
Rinse the dry Quinoa ( 300 gr ) and soak it in water for 8 hours or overnight.
Step 2
Preheat the oven to 395°F ( 200°C ).
Step 3
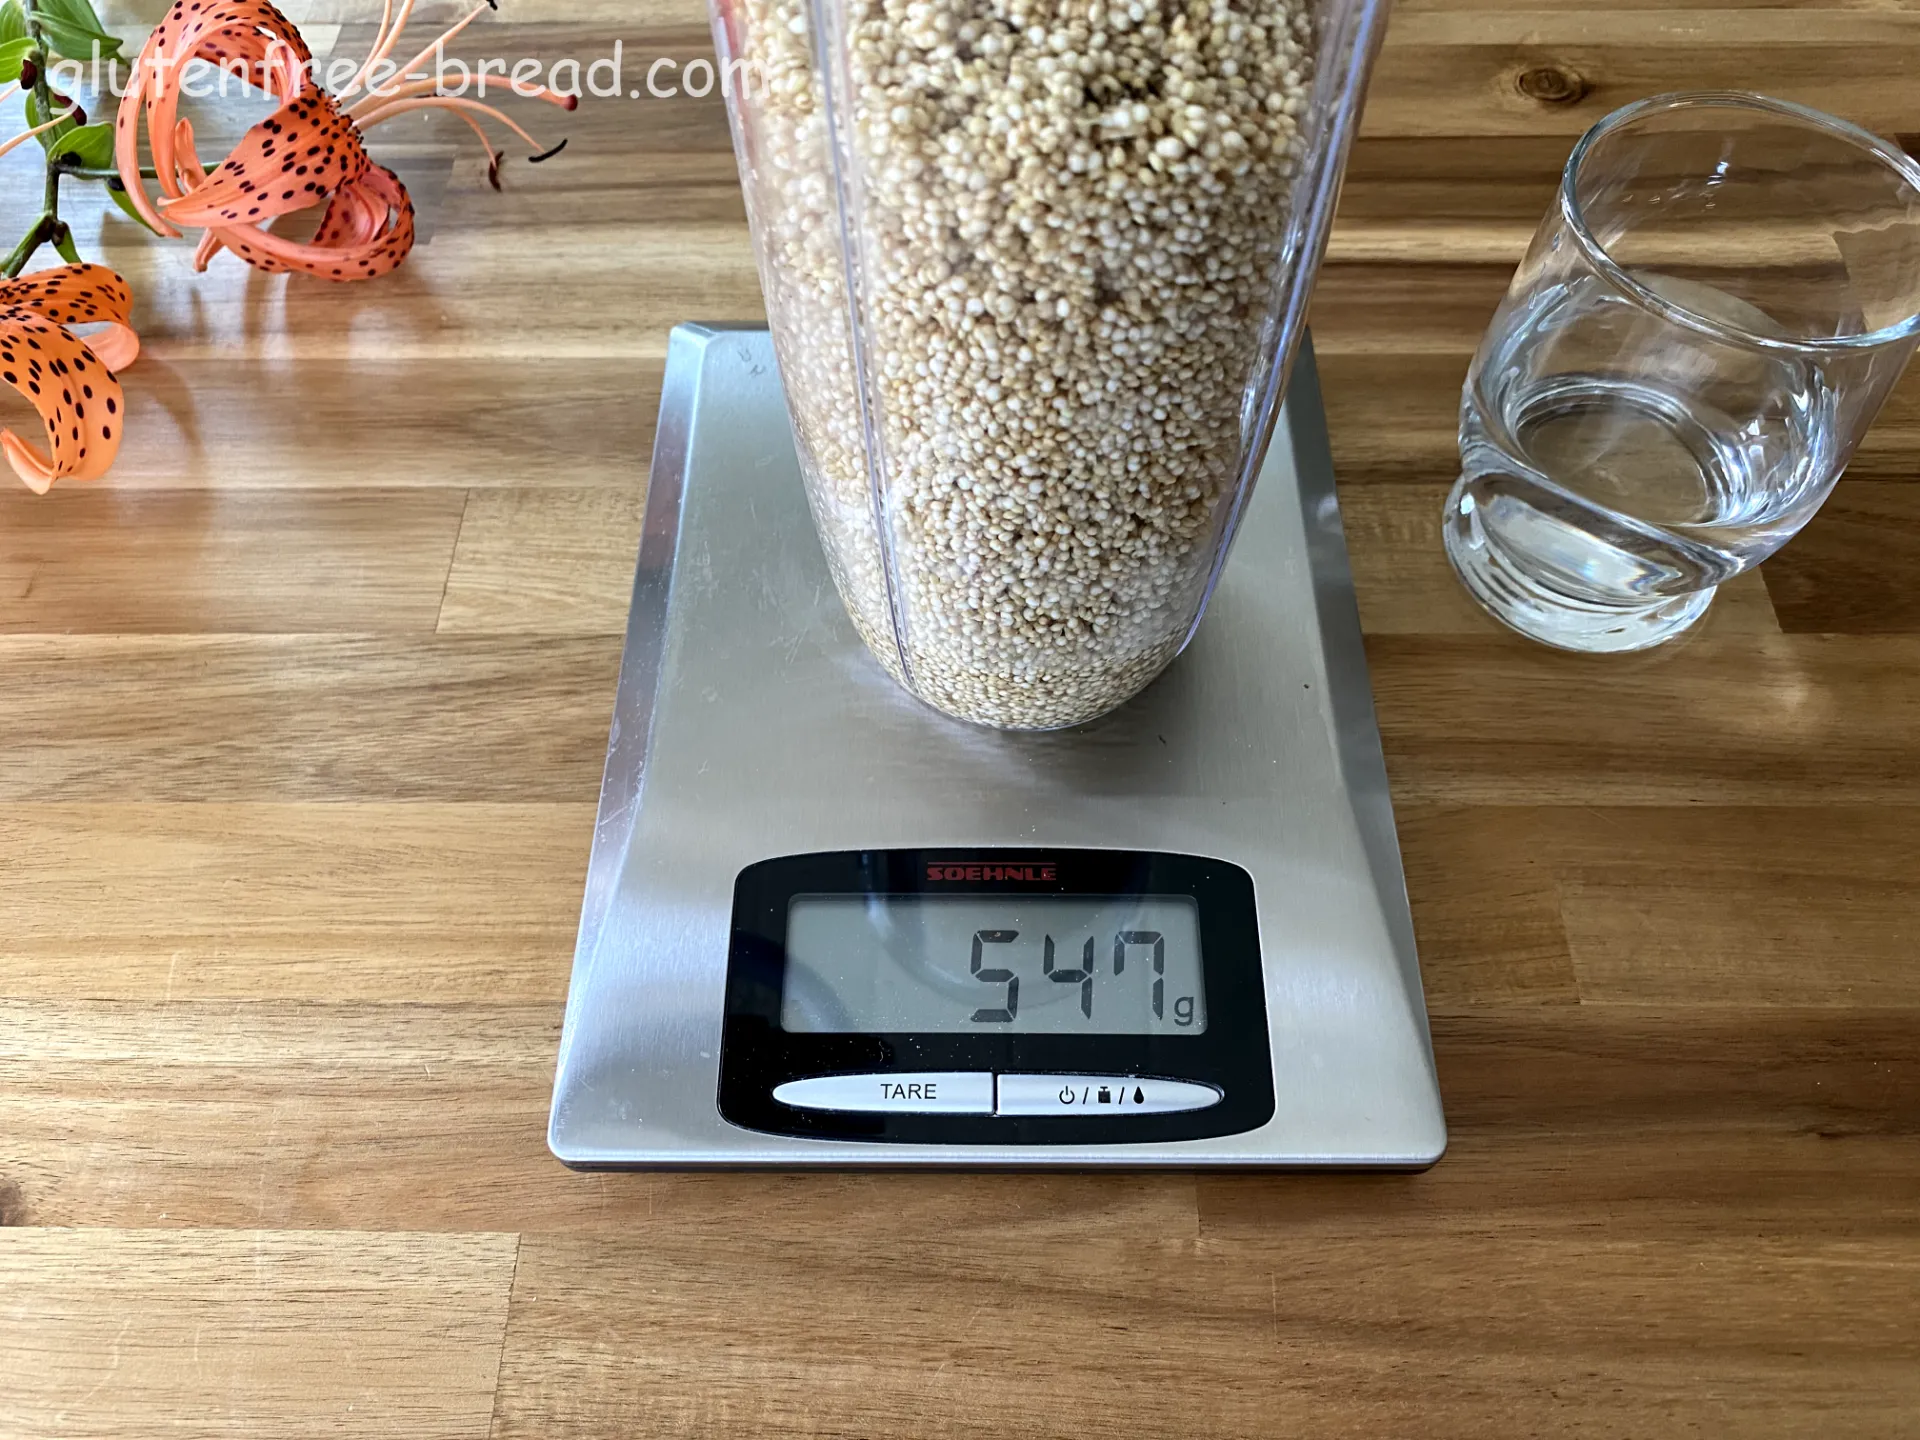
After the Quinoa has soaked, place the well-drained grains on a scale to determine how much water they have absorbed.
Step 4
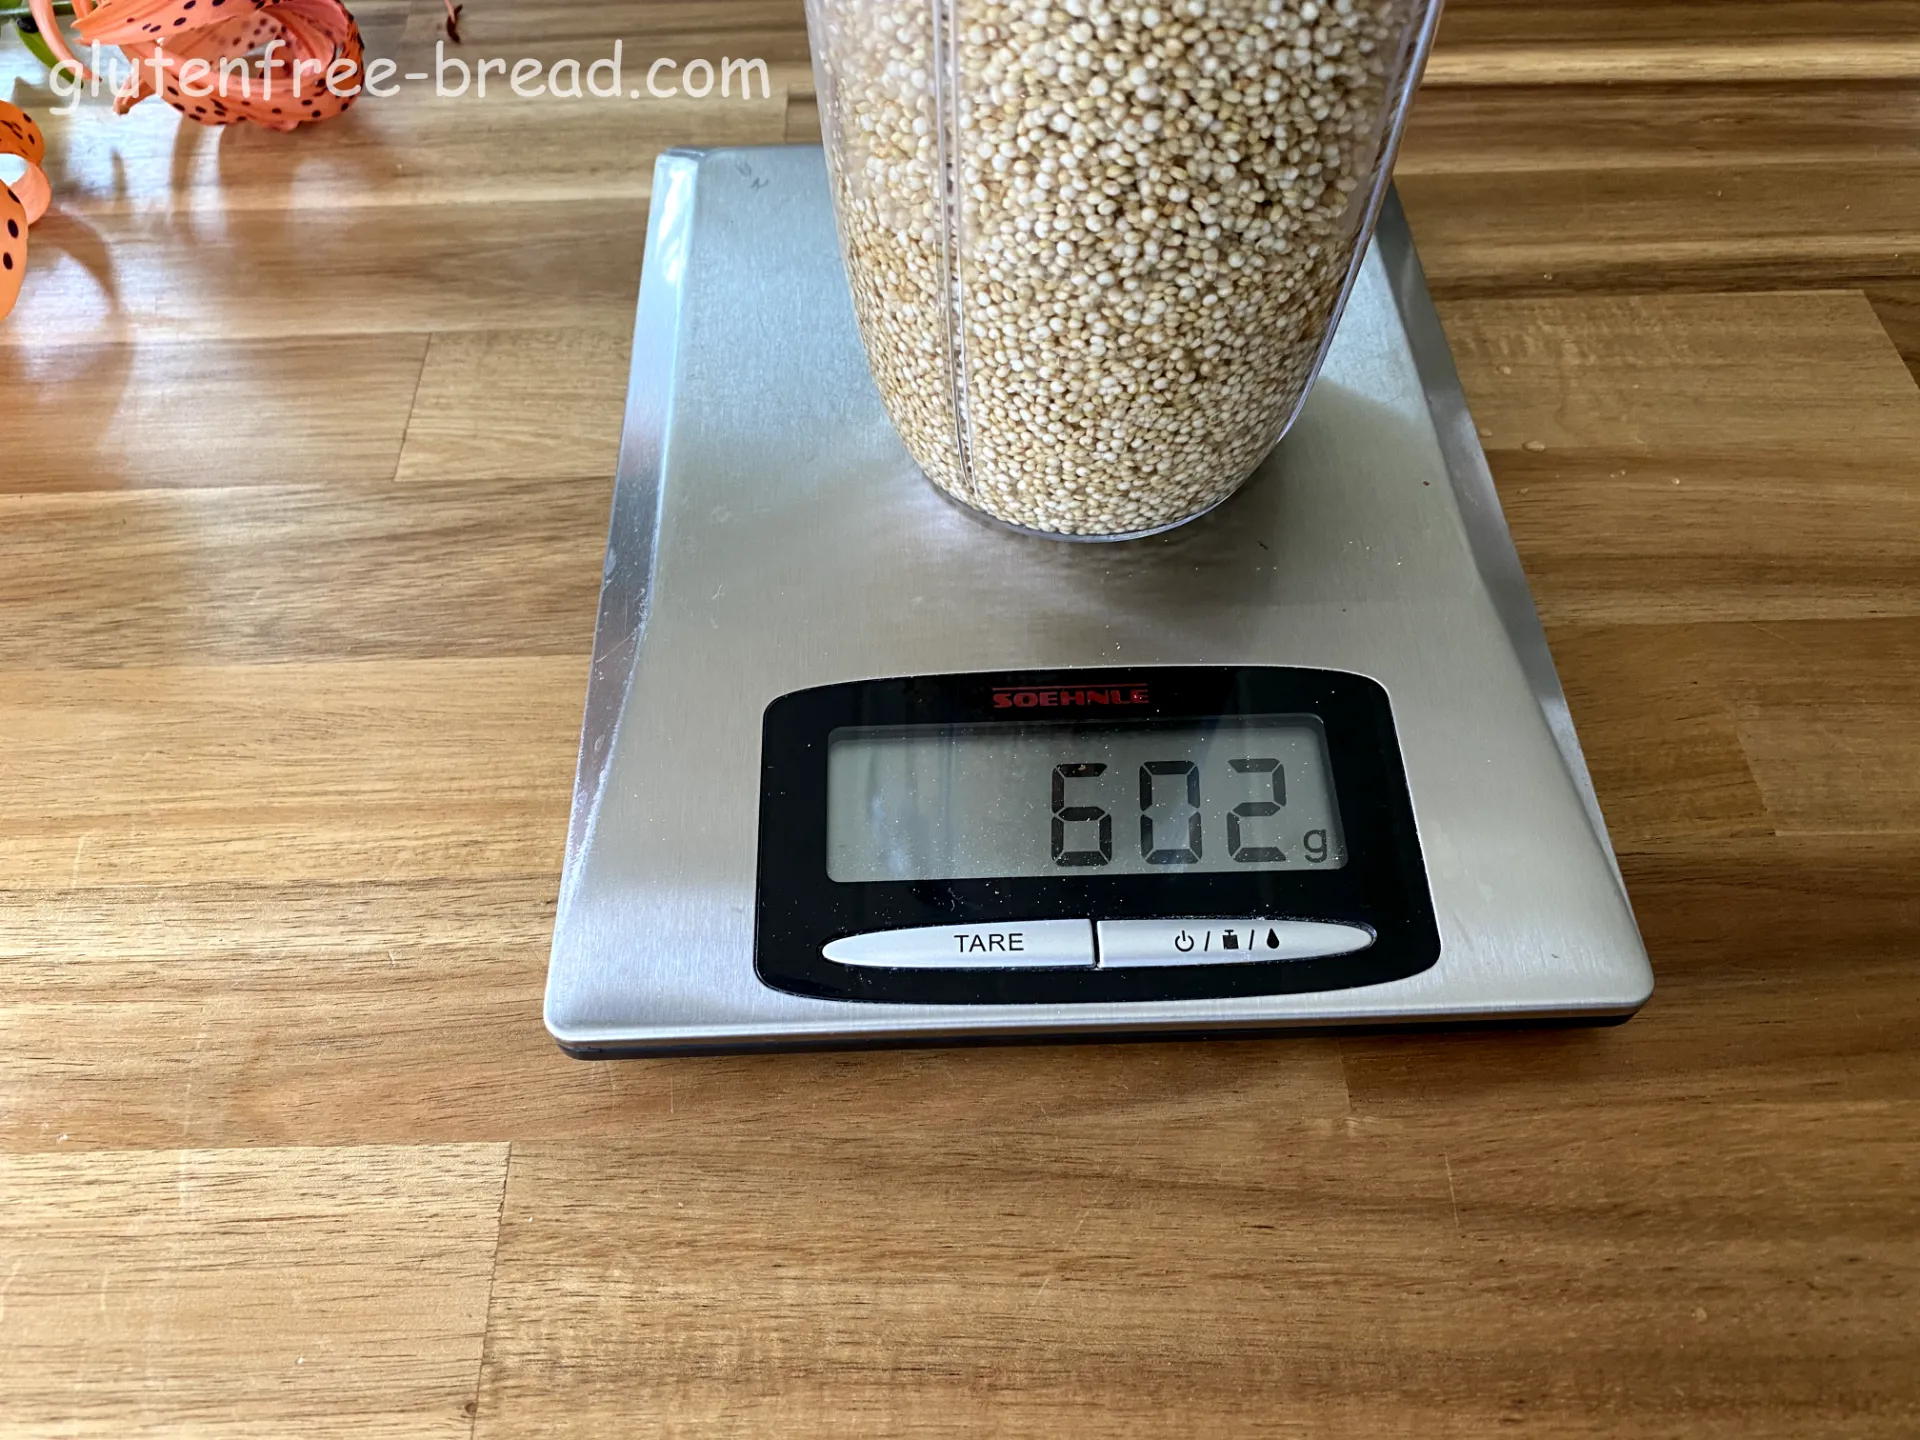
Add water until you reach a total of 600 grams of Mixture. Add Salt and Spices to taste.
Step 5
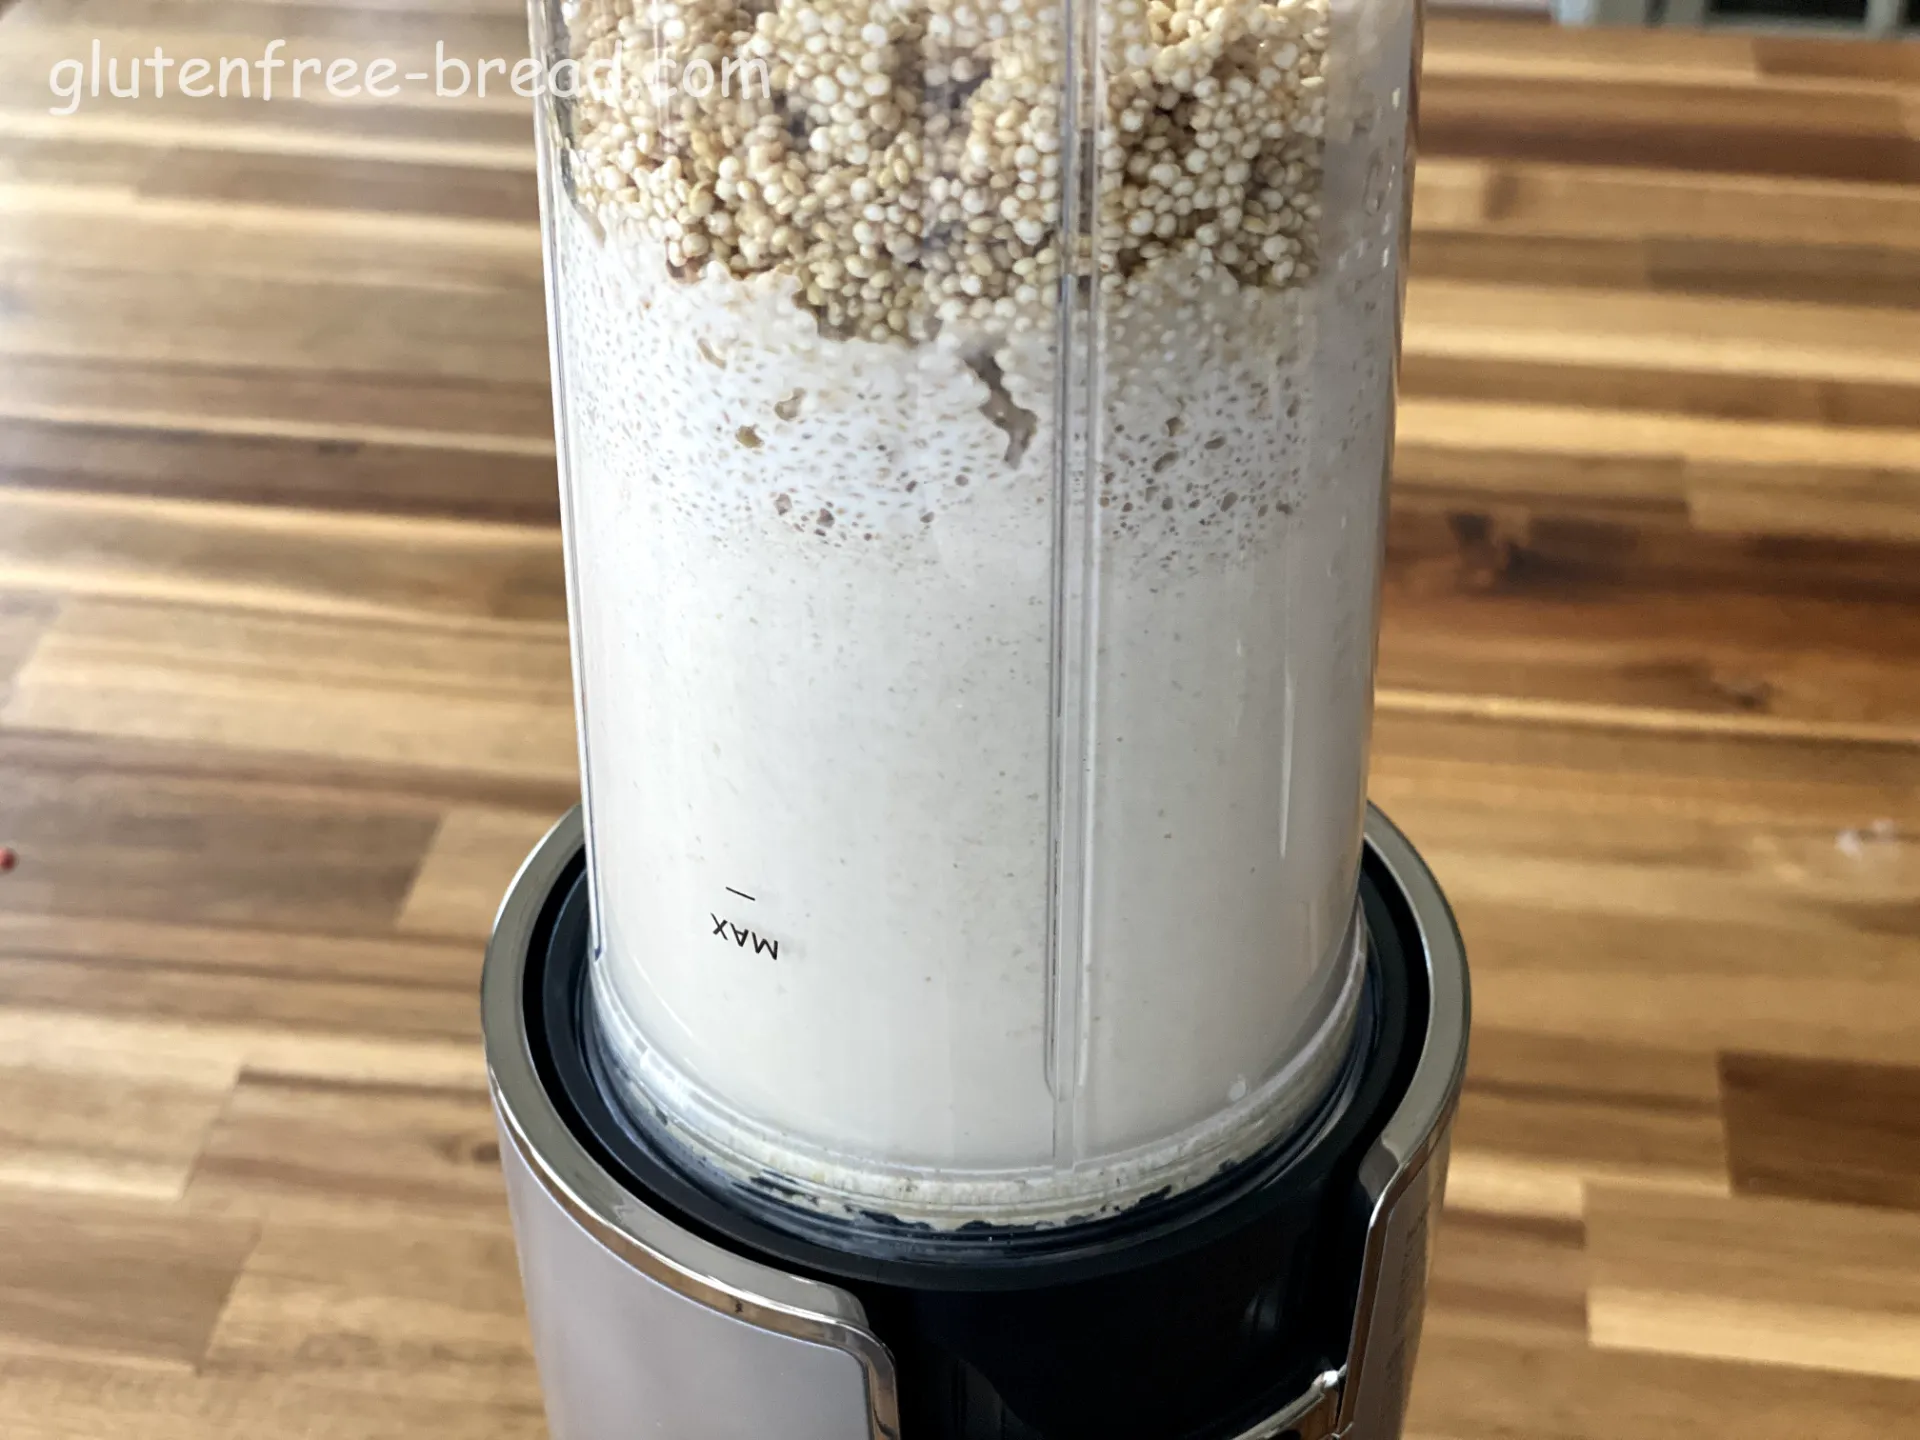
Transfer the mixture to a blender and process until you obtain a very smooth paste.
Step 6
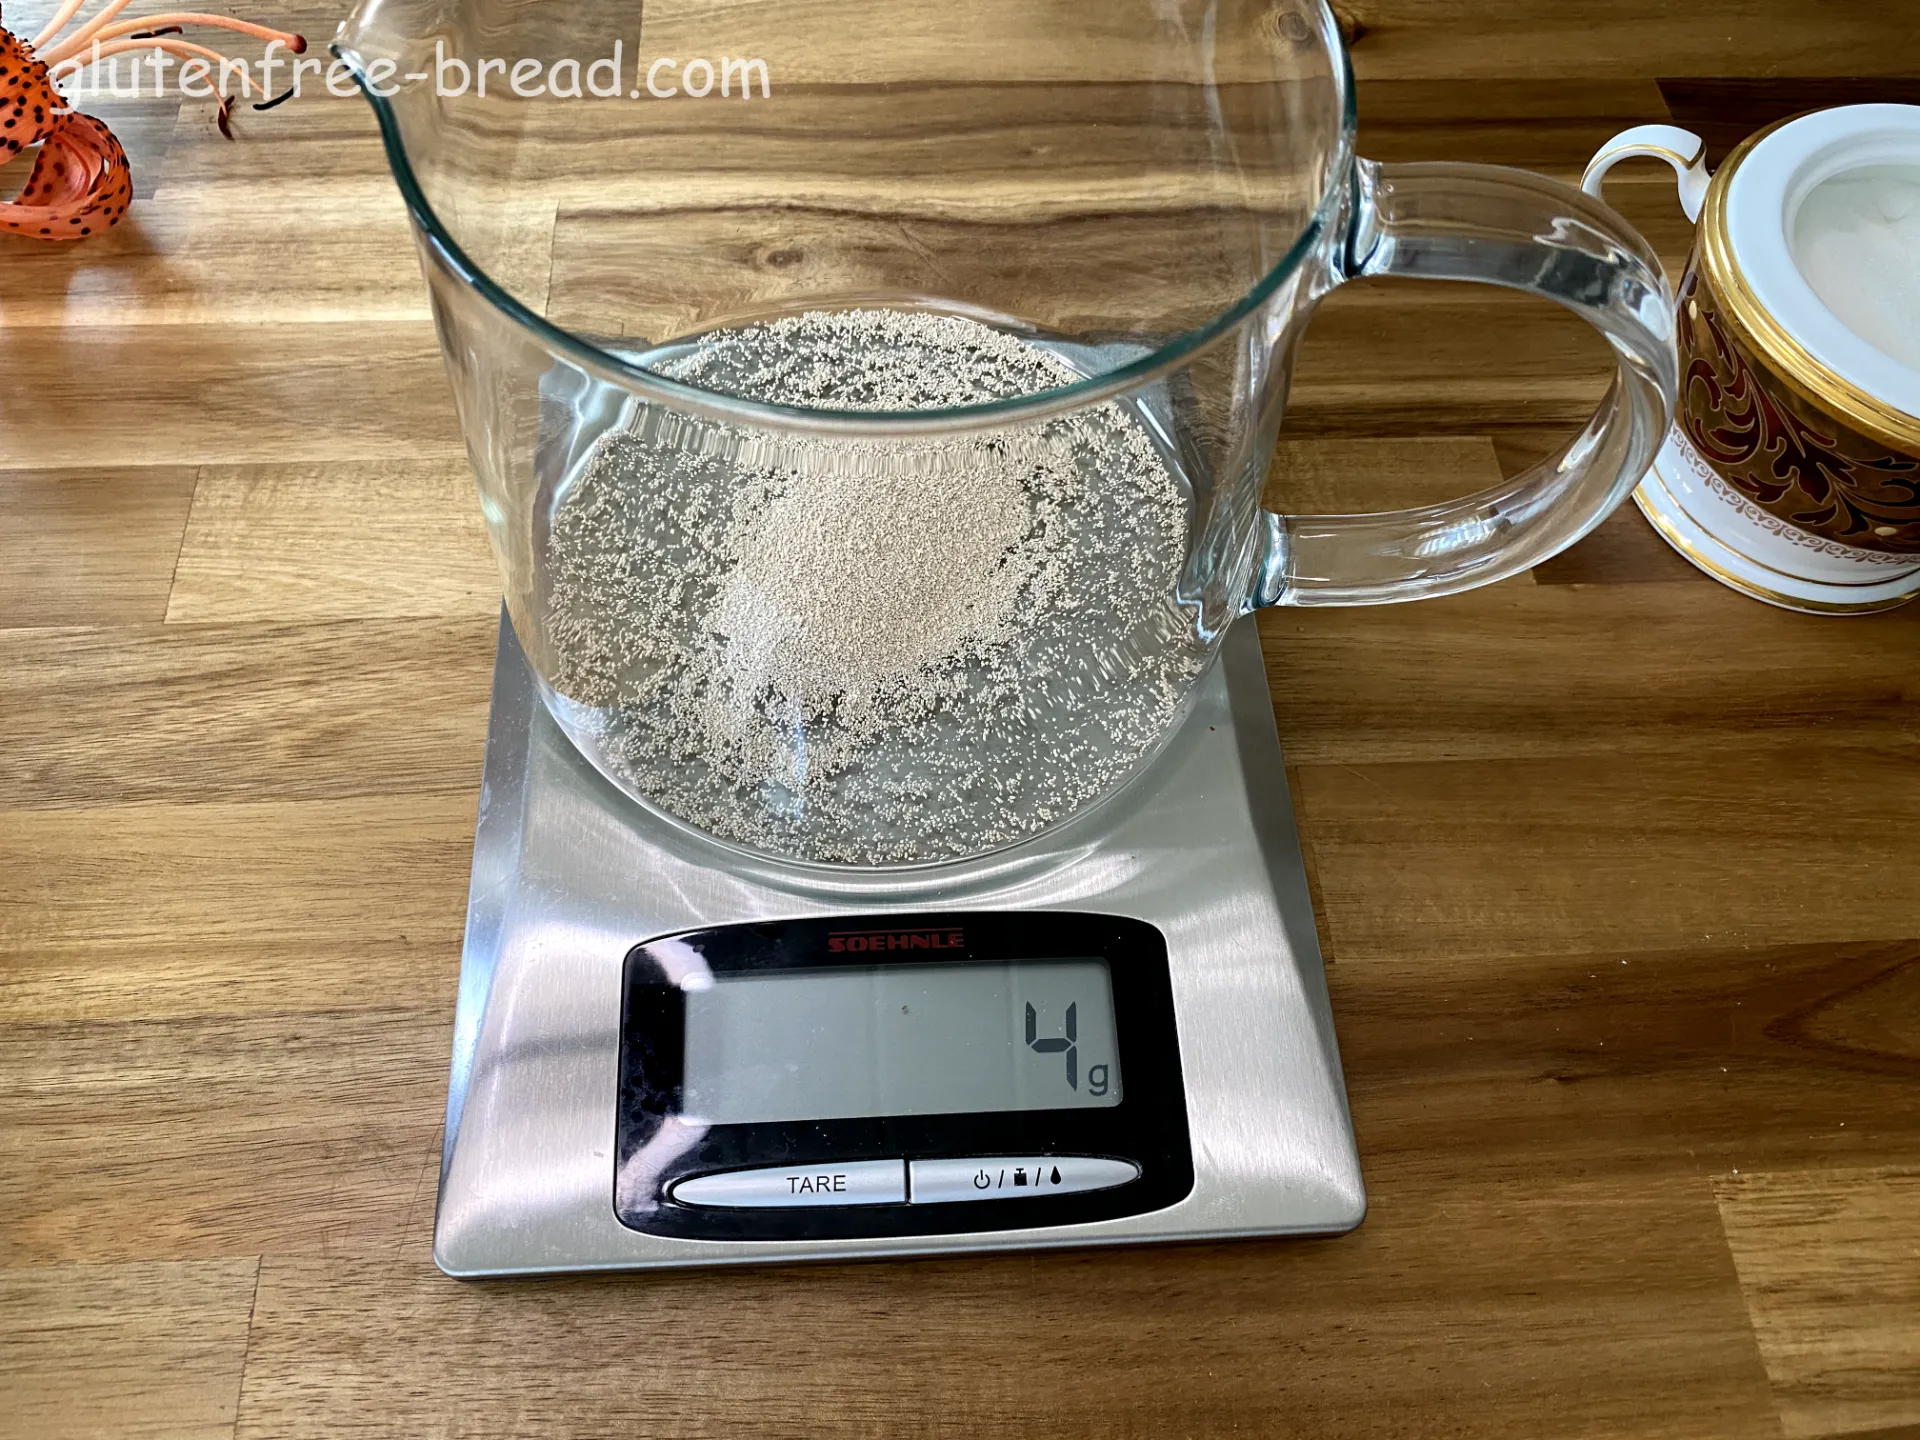
Activating the Yeast: In a bowl, combine the Sugar (1 tsp) with the dry Yeast (4 gr) and 4-5 tbsp of the blended Quinoa Mixture. Mix well to ensure the ingredients are combined. (Important: Do not add the yeast directly to the quinoa mixture from the blender, as the high temperature could compromise the yeast’s effectiveness.)
Step 7
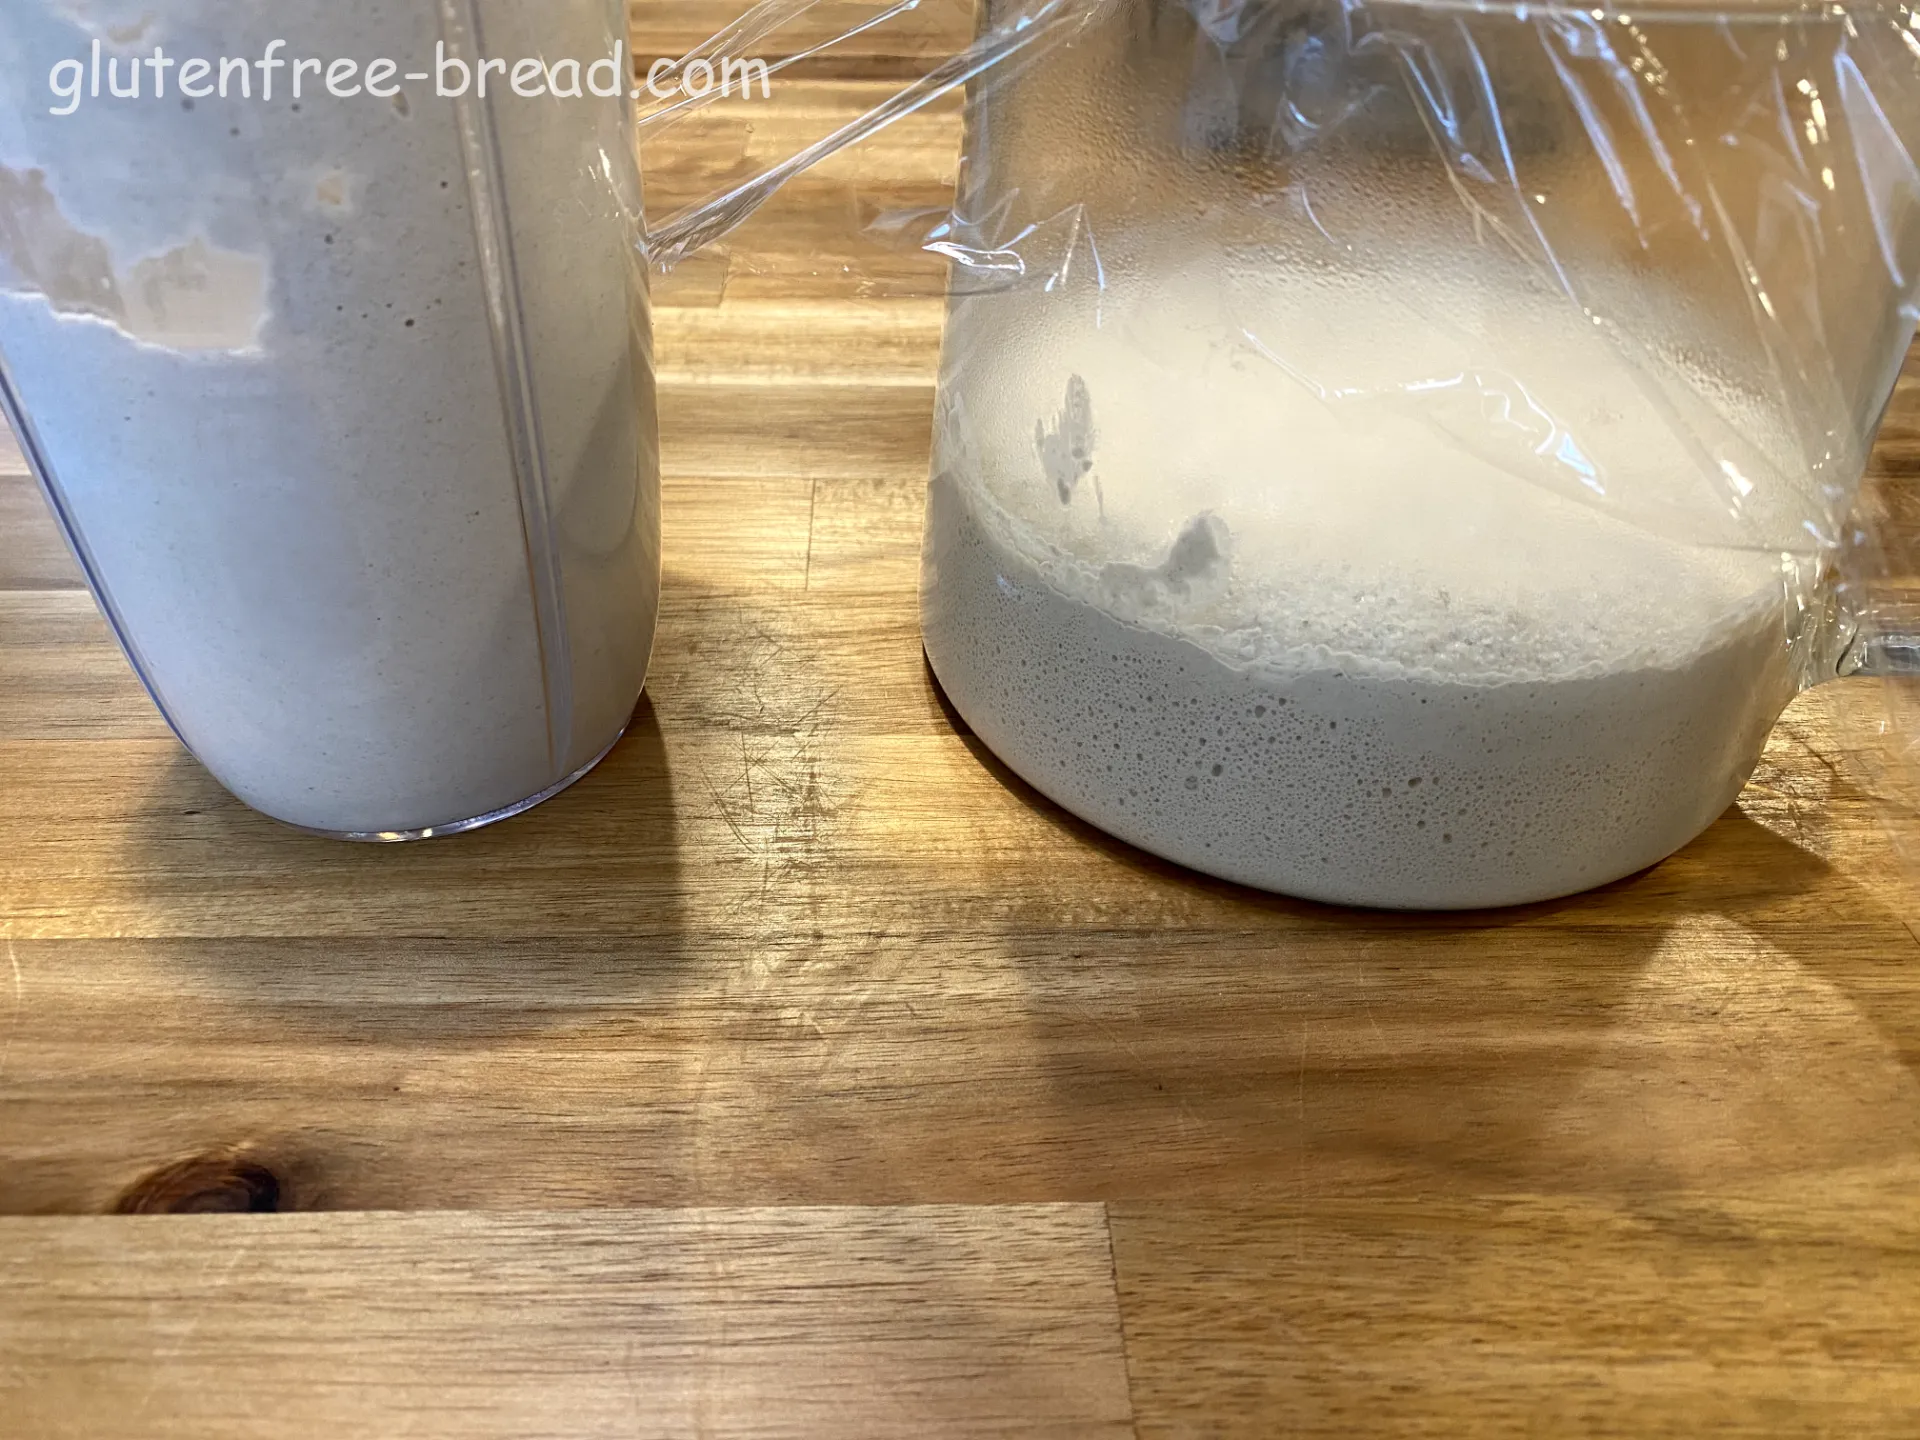
Allow the yeast mixture to rise for about 6 minutes. You will see the yeast activating around the edges of the bowl, with bubbles forming and the mixture beginning to expand.
Step 8
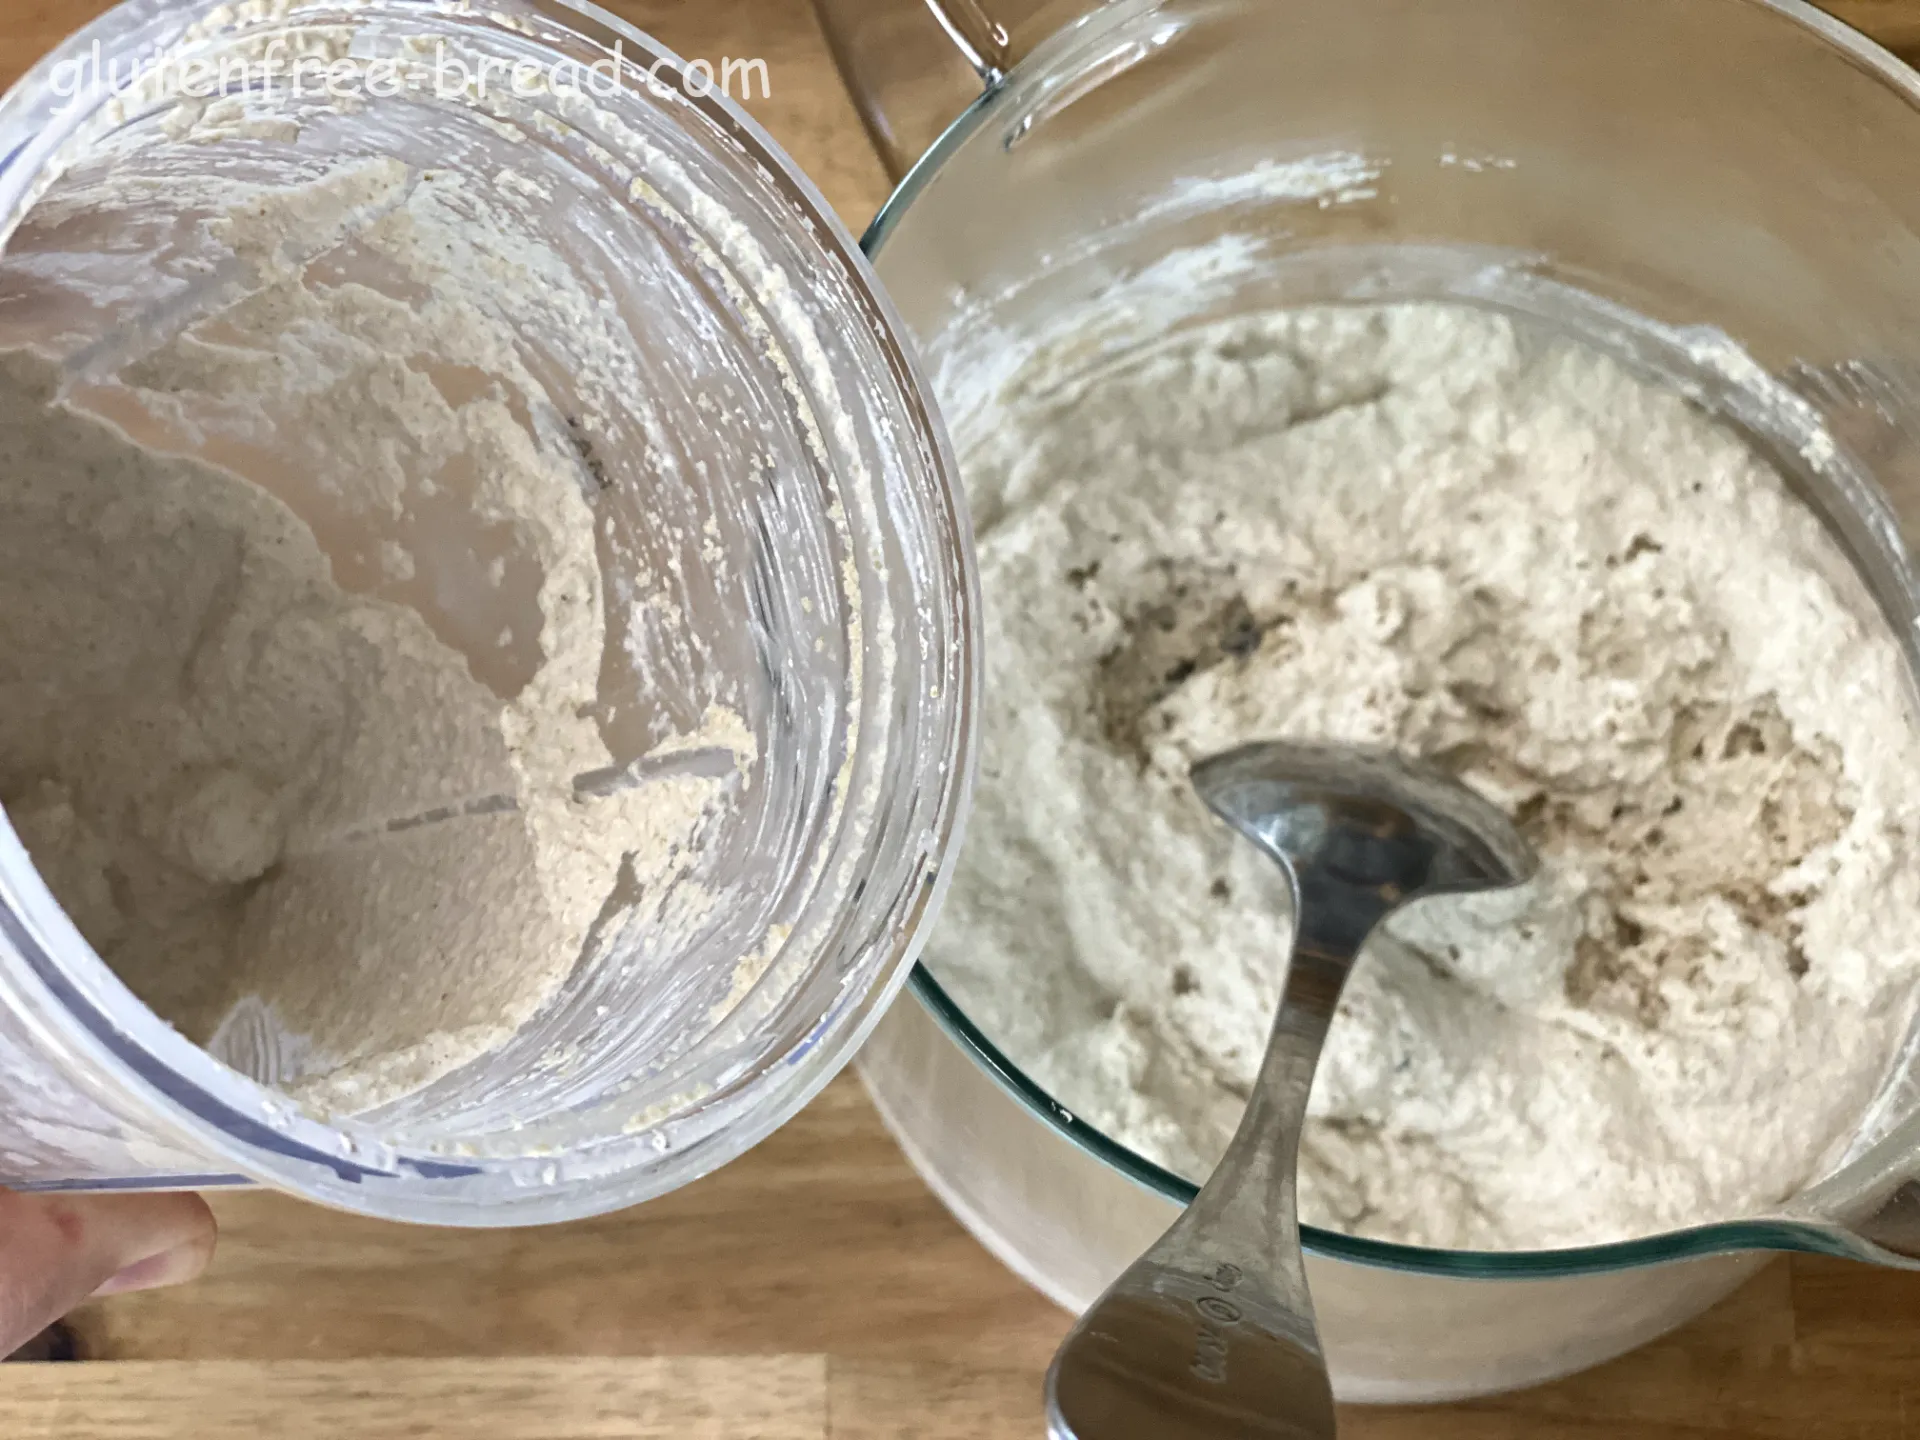
Now, combine the entire mixture: add the Quinoa Mixture from blender to the risen Quinoa Mixture and stir well to ensure they are thoroughly combined.
Step 9
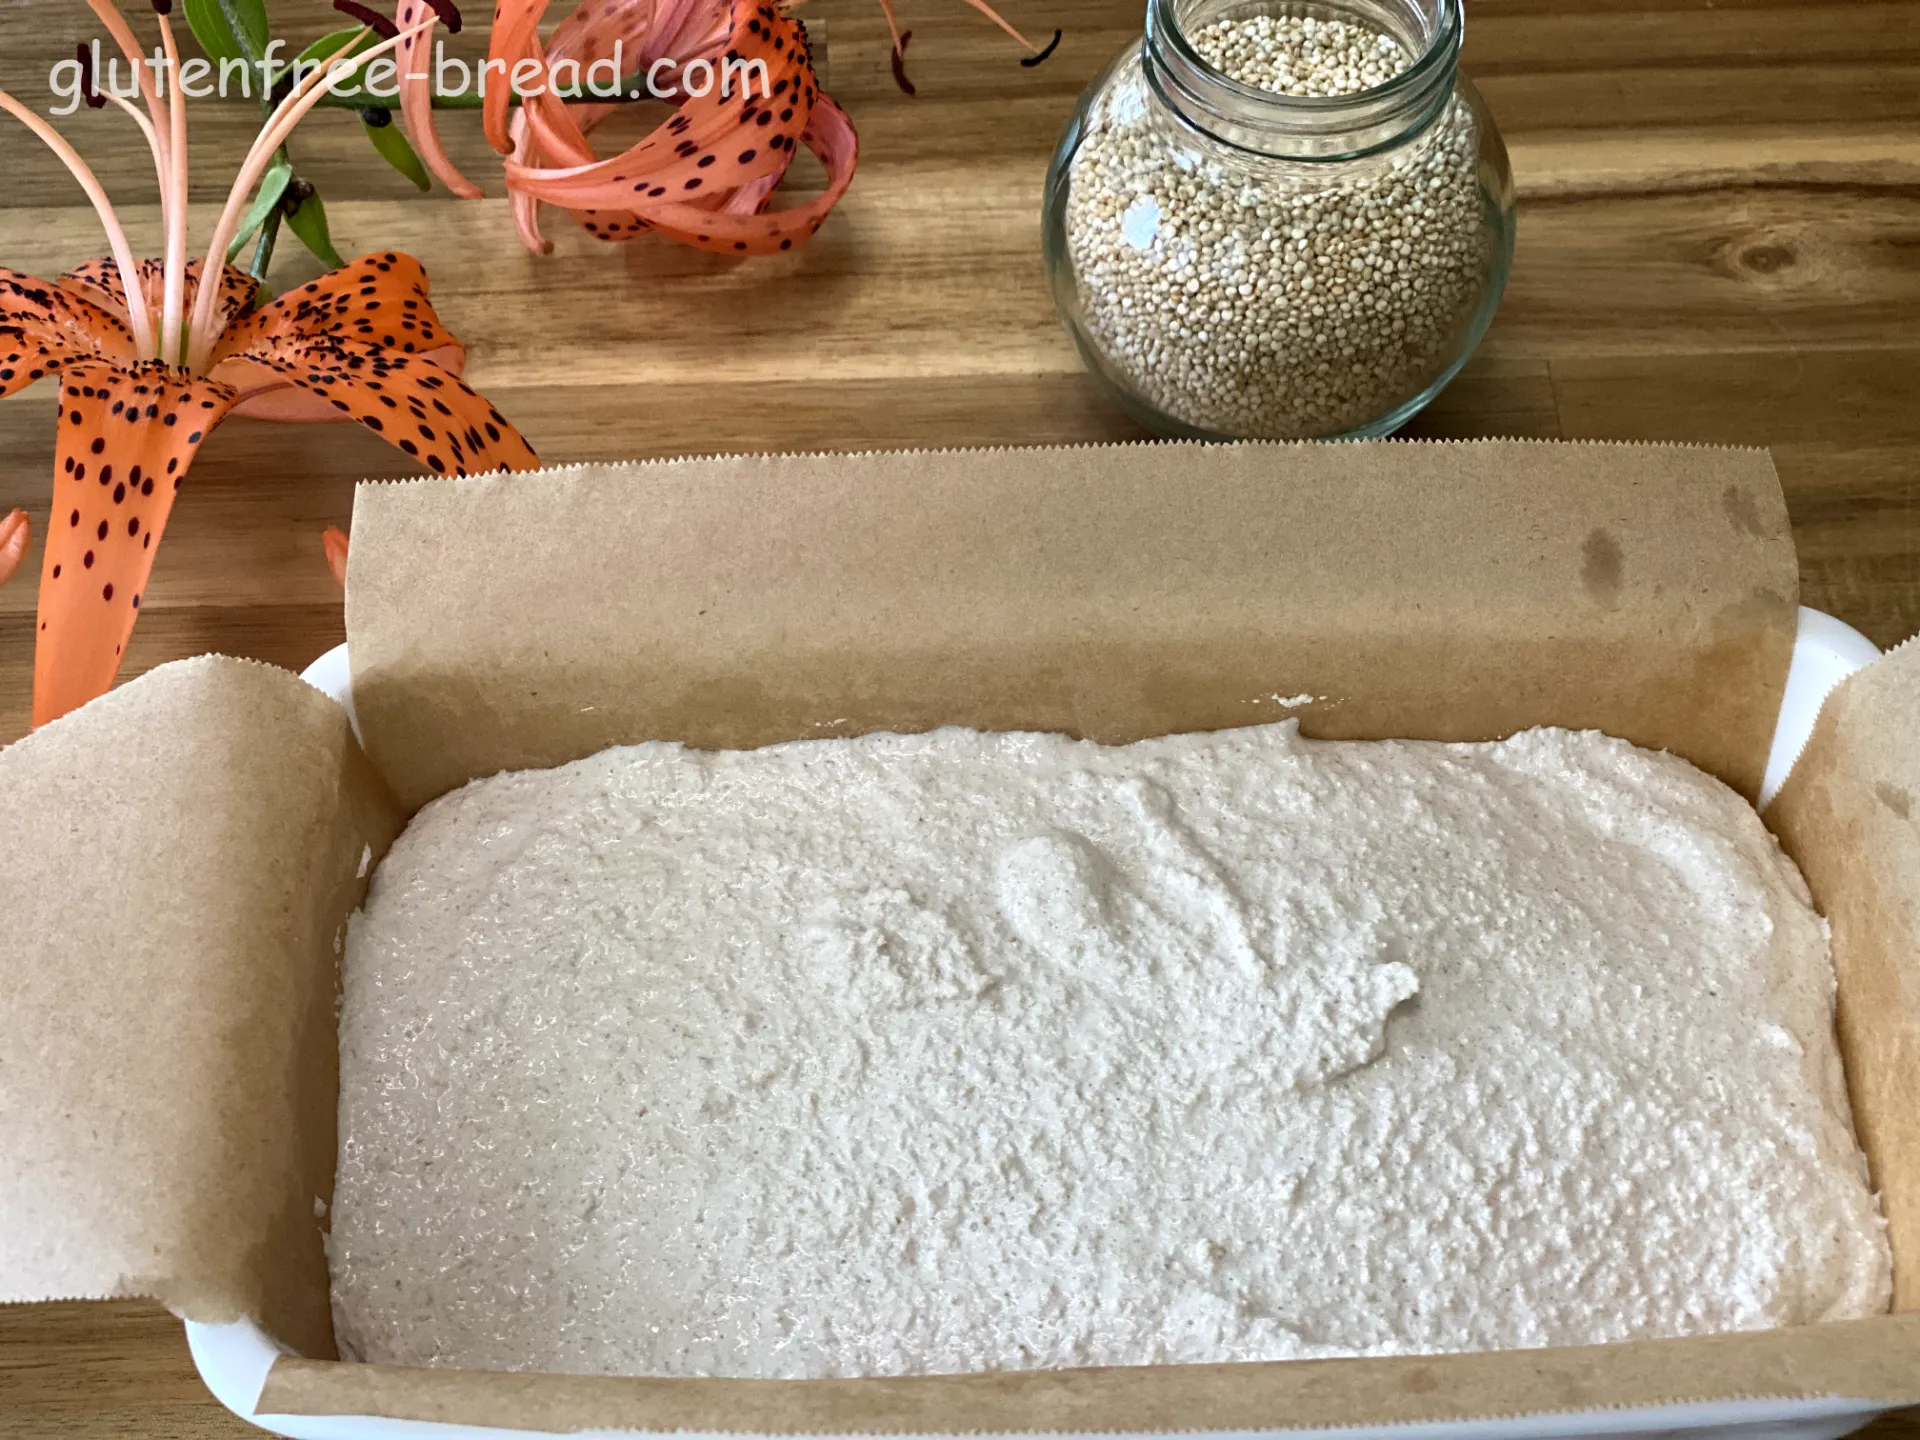
Transfer the dough into the baking pan. Smooth the top out with a spatula and sprinkle with seeds of your choice.
Step 10
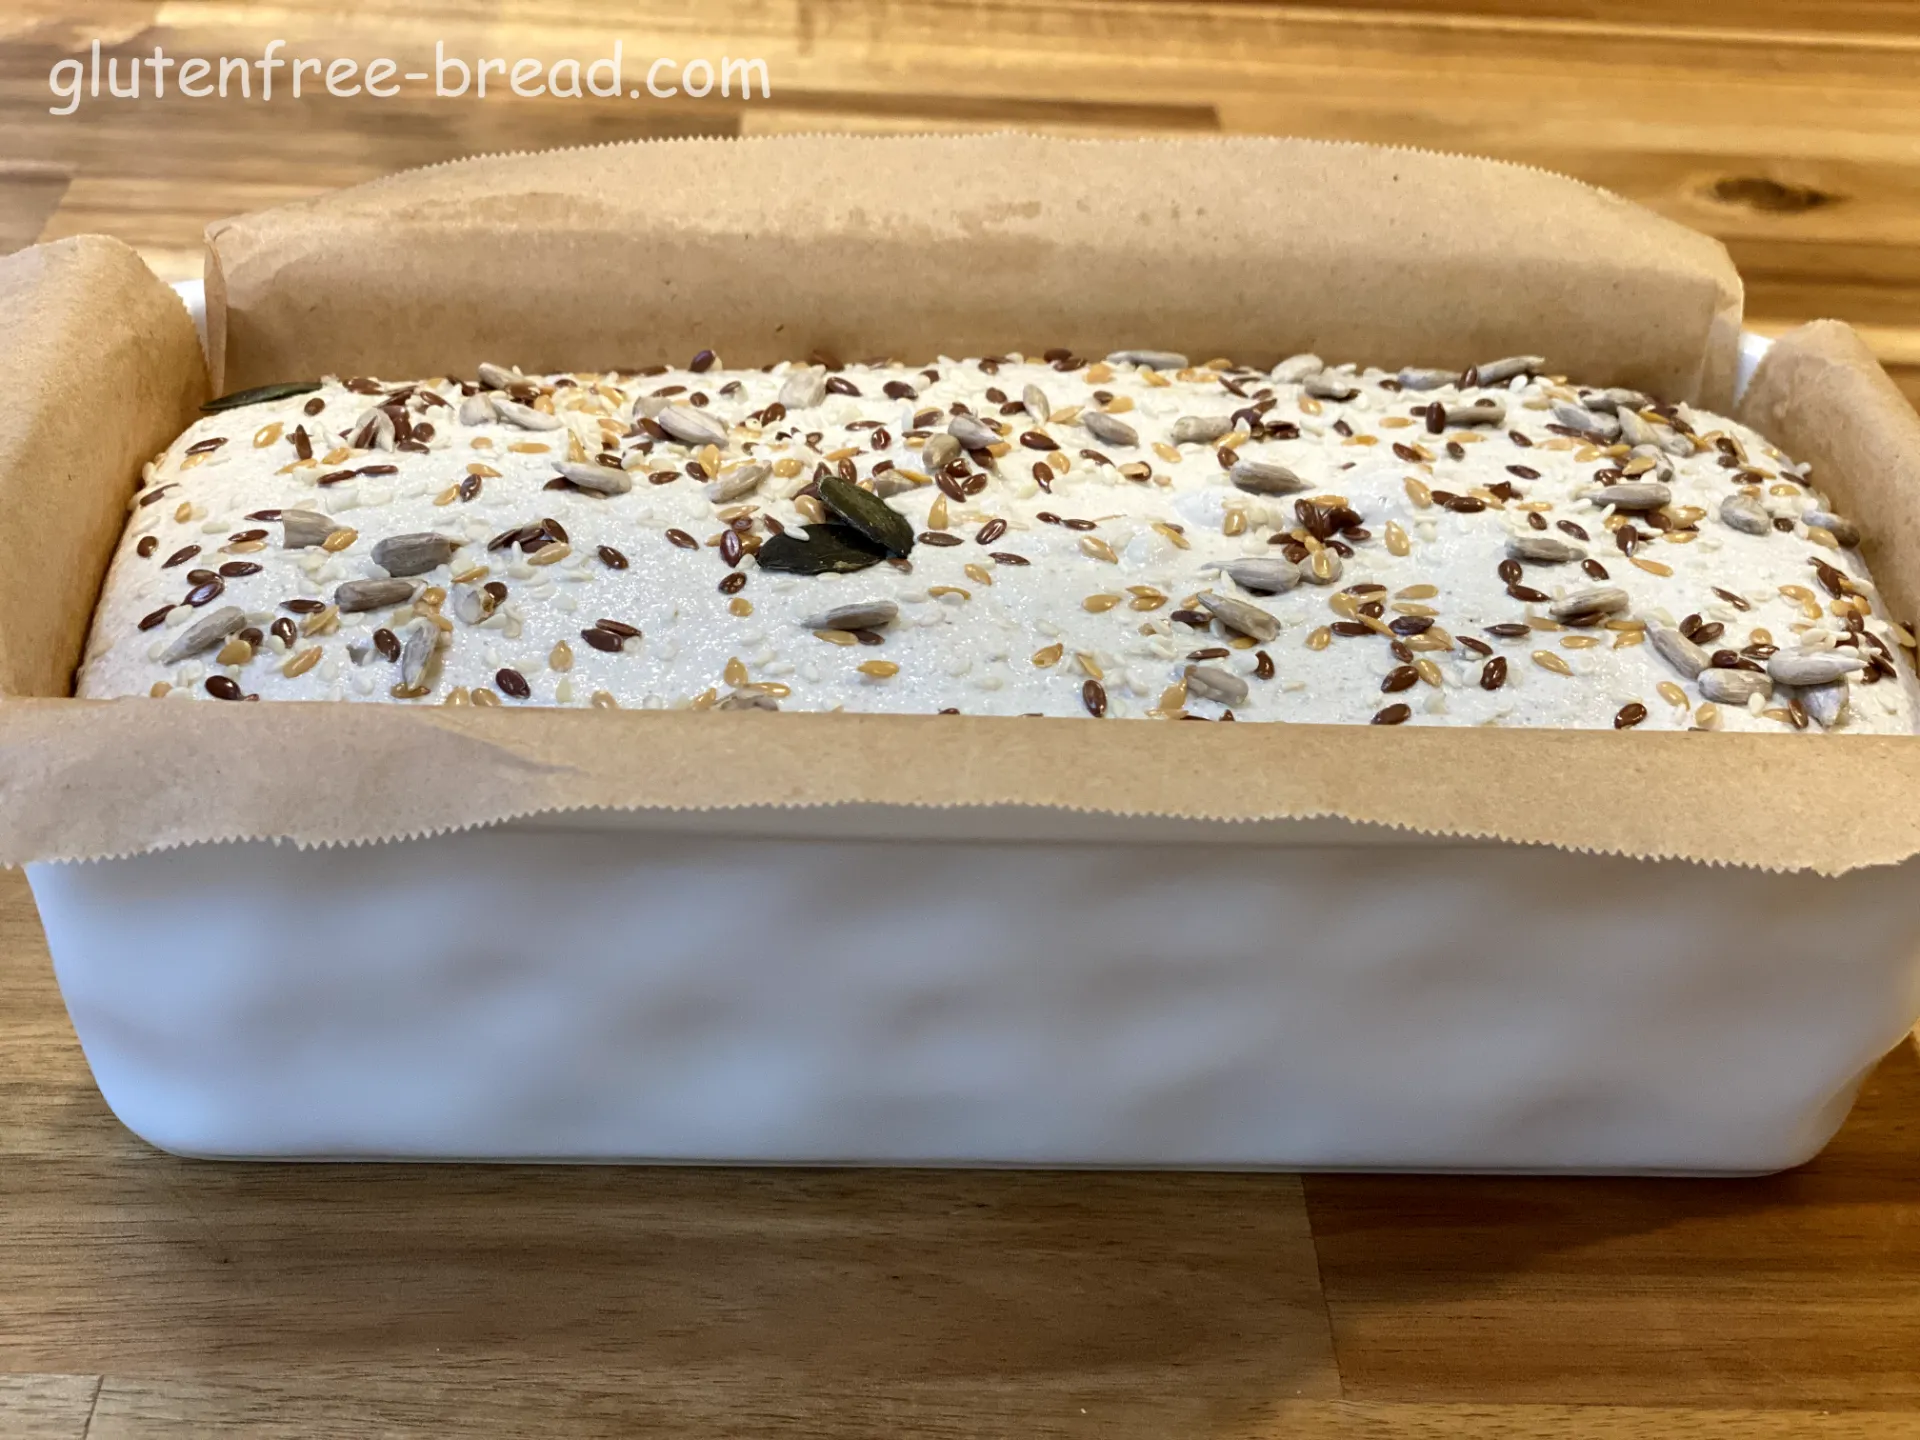
Allow the bread to rise until it increases by about 0.5 inches (1.5 cm) in the pan. Do not expect the dough to double in volume. If the bread rises too much during proofing, it may not bake evenly and could develop a bulge. Depending on the room temperature, the rising time should be between 10 to 15 minutes.
Step 11
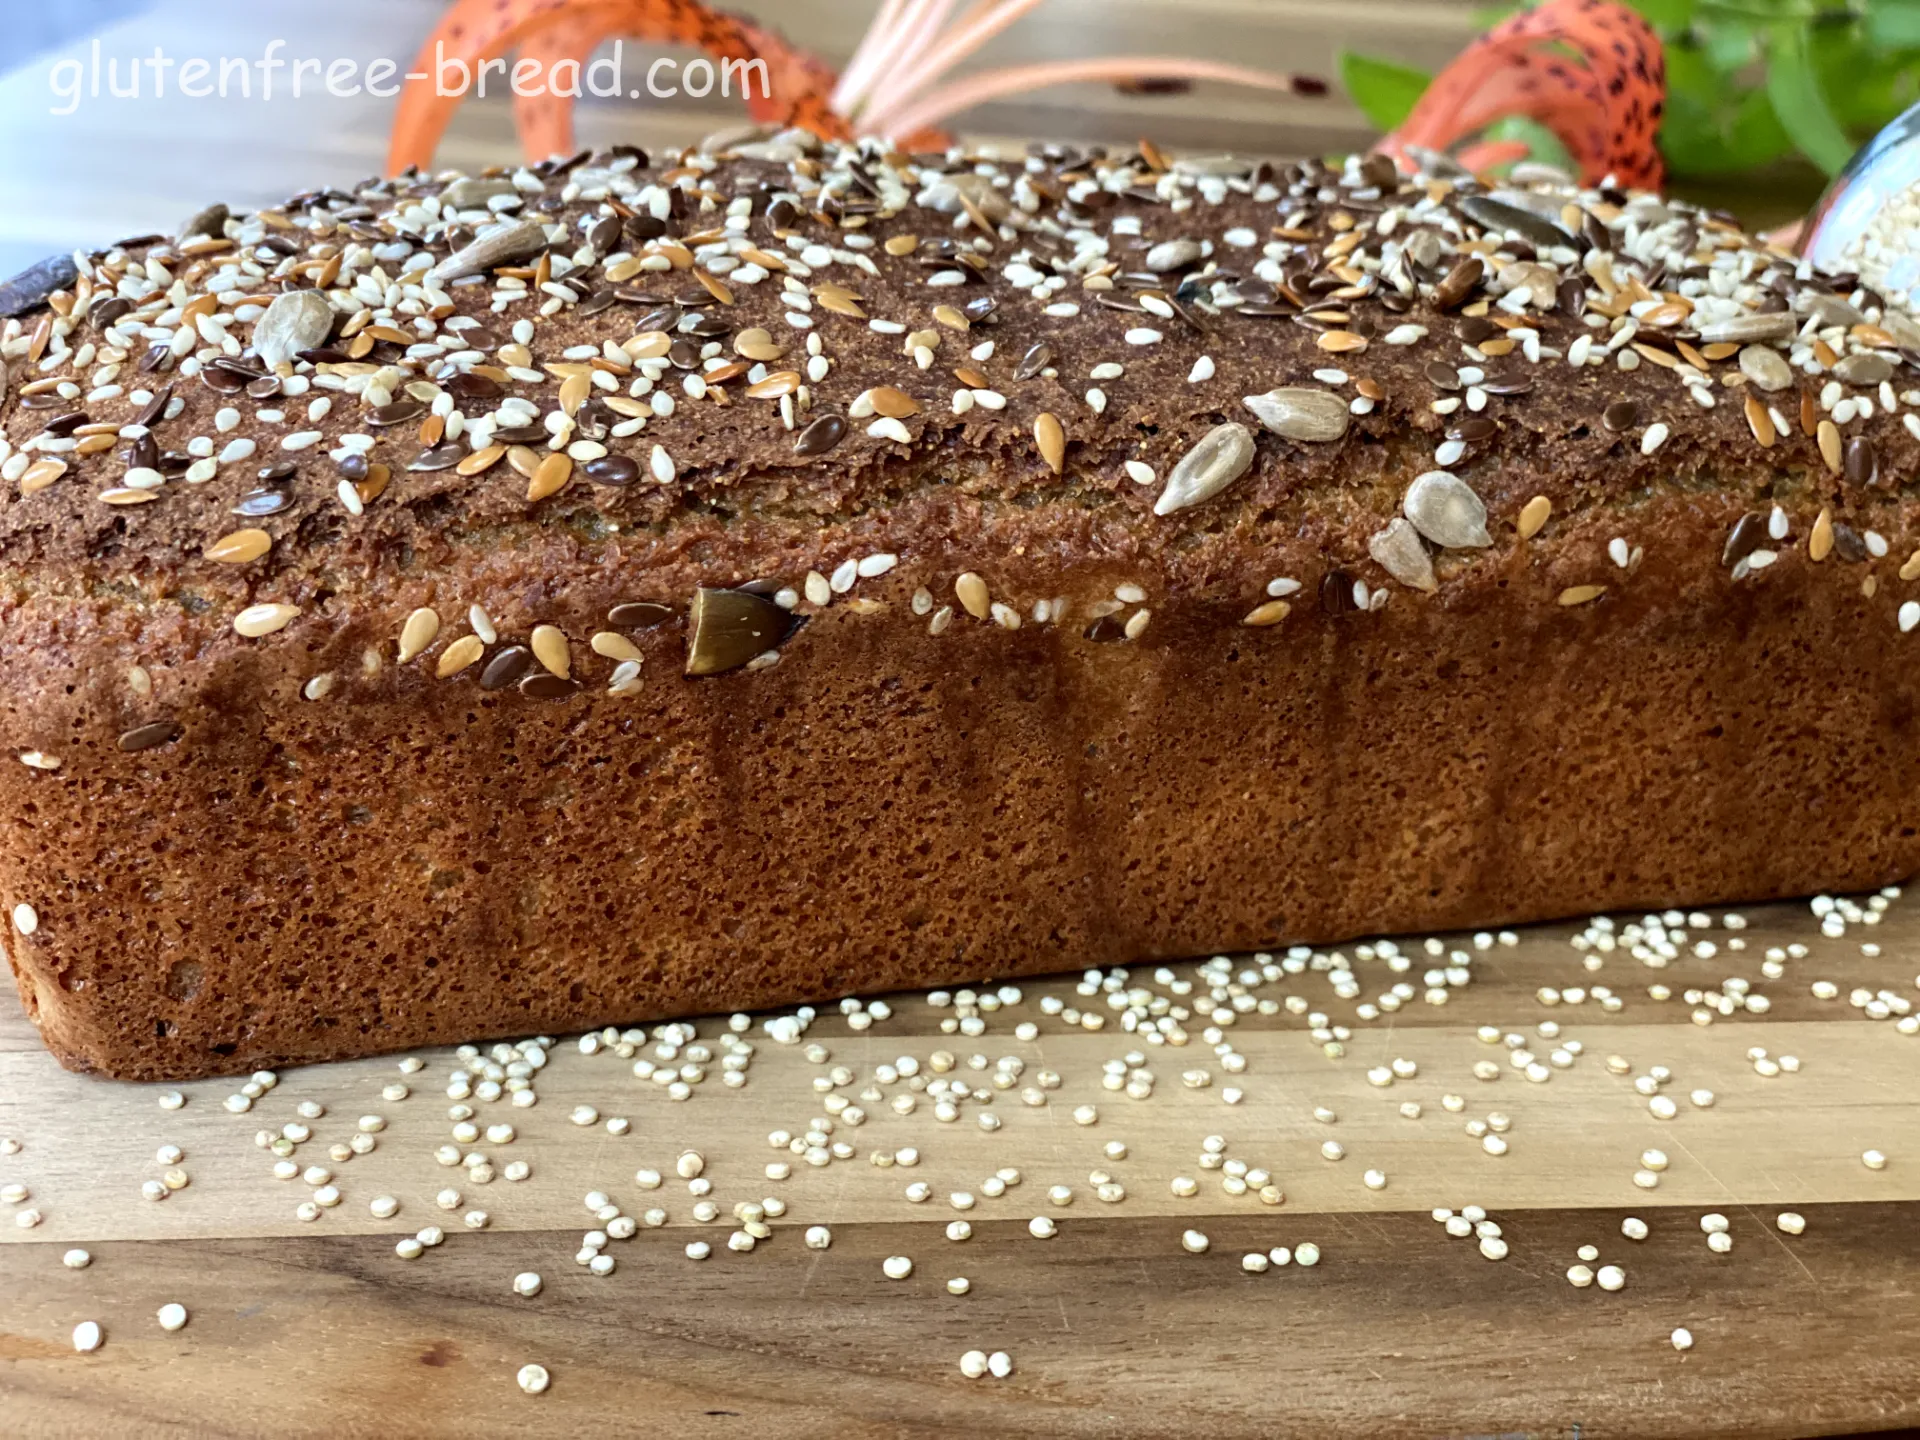
Bake the bread in the preheated oven for about one hour. Baking times can vary depending on your oven, so it's advisable to check the bread towards the end of the suggested baking time. Performing a tap test or a skewer test can help confirm that the bread is fully cooked.
Step 12
Allow it to cool completely on a wire rack. This ensures the bread maintains its proper texture and prevents condensation, which can make it soft and sticky. Enjoy!
Notes:
Quinoa Bread 1 Ingredient with Yeast
Performing a few tests can help ensure that your bread is fully cooked. Here are some common methods:
Tap Test:
- Gently tap the bottom of the bread with your fingers. If it sounds hollow, the bread is likely done. If it sounds dense or muffled, it may need more time.
Toothpick or Skewer Test:
- Insert a toothpick or skewer into the center of the bread. If it comes out clean or with just a few crumbs, the bread is done. If the toothpick comes out with wet batter, the bread needs more time to bake.
Temperature Check:
- Use an instant-read thermometer to check the internal temperature of the bread. Most breads are fully baked when the internal temperature reaches about 190-200°F (88-93°C).
Visual Inspection:
- Look for a golden-brown crust and check that the bread has risen and appears firm. The edges should be slightly pulling away from the pan.
Inadequate Consistency:
- Problem: The bread may have a dense or wet texture due to excess moisture from the quinoa.
- Solution: Ensure that the quinoa is thoroughly drained and that excess water is completely removed before adding it to the dough. Adjust the amount of water added to the recipe based on the dough's consistency.
Bread Does Not Rise:
- Problem: The bread does not rise adequately due to inactive yeast or incorrect temperature.
- Solution: Check if the yeast is fresh and active. You can test its activation by mixing it with sugar and warm water to see if it forms a foam. Ensure that the dough rises in a warm, draft-free area.
Crust Too Hard:
- Problem: The crust of the bread may become too hard or crisp.
- Solution: Brush the bread with a small amount of oil or a mixture of water and oil before baking to achieve a softer crust. Also, make sure not to overbake the bread.
Bread Tastes Bitter:
- Problem: The bread may have a bitter taste due to quinoa saponins or other ingredients.
- Solution: Ensure that the quinoa is well rinsed and washed before use. Changing the water during soaking can help reduce bitterness.
Bread Bakes Unevenly:
- Problem: The bread may bake unevenly, with some parts more done than others.
- Solution: Use a well-preheated baking pan and position it in the center of the oven for even baking. You can also rotate the pan halfway through the baking time for more uniform results.
Useful Tips
Preheat the Oven:
- Make sure the oven is well preheated to the temperature specified in the recipe before placing the bread inside.
Use an Oven Thermometer:
- Check the oven temperature with a thermometer to ensure accuracy, as temperature discrepancies can affect baking.
Toothpick Test:
- Use the toothpick test to check if the bread is fully baked. The toothpick should come out clean from the center of the bread.
Cool the Bread:
- After baking, let the bread cool completely on a wire rack before slicing. This helps stabilize the bread’s structure and improves texture.
Adjust Baking Time:
- Baking time may vary depending on the oven type and bread size. Pay attention to color changes and the bread’s texture to avoid overbaking.
Follow these tips and solutions to address common issues and achieve well-baked, delicious quinoa bread.